5 things we’ve learned from refinishing furniture
Since moving into our new home last year, Will and I have started tackling larger DIY projects, taking advantage of the extra space we have to spread out (since working on a Toronto apartment balcony wasn’t the best option before!). These larger projects involve refinishing a few pieces of furniture, all of which we’ve placed in the nursery to prepare for our little one’s arrival.
Throughout the process of refinishing these pieces, we have learned a couple things that we’re excited to share with you today in hopes that this helps with your next big DIY project and encourages you to take a leap of faith to try something new.
1. Don’t be afraid!
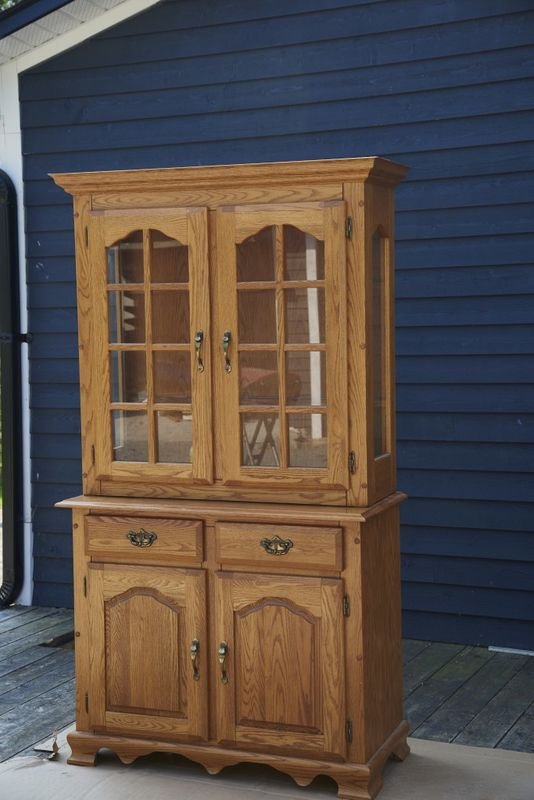
Before starting our first refinishing project, we talked about it for over a year. We were planning on painting and grey-washing a hutch from my grandma’s house that we inherited when she moved into a nursing home. We knew exactly what we wanted to do with it, but it took us a while to get started because of the thought of the amount of work involved, the inevitable mess and the unknown of the finished product. What would happen if I didn’t like how it turned out? Would the entire hutch be ruined?
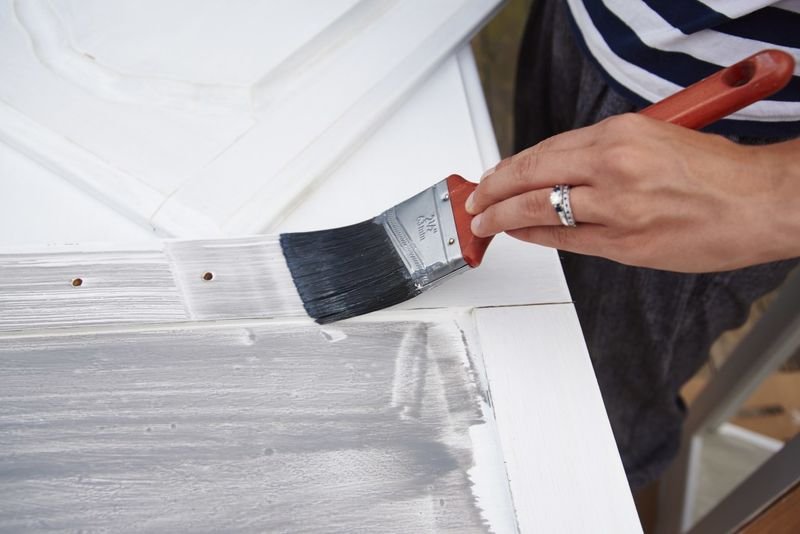
We eventually jumped into the project one summer day, and we couldn’t have been happier with the result. We removed the hardware, sanded down each piece with a light sandpaper, and began our base coat of white paint. Because we were doing a grey-wash, we weren’t worried about getting the white coats perfect. We did about 2 coats of the white paint before jumping into the wash. The good thing about painting furniture is that you can always re-sand and re-paint. Nothing is every set in stone if you don’t like the final result.
2. When in doubt, add a “wash”
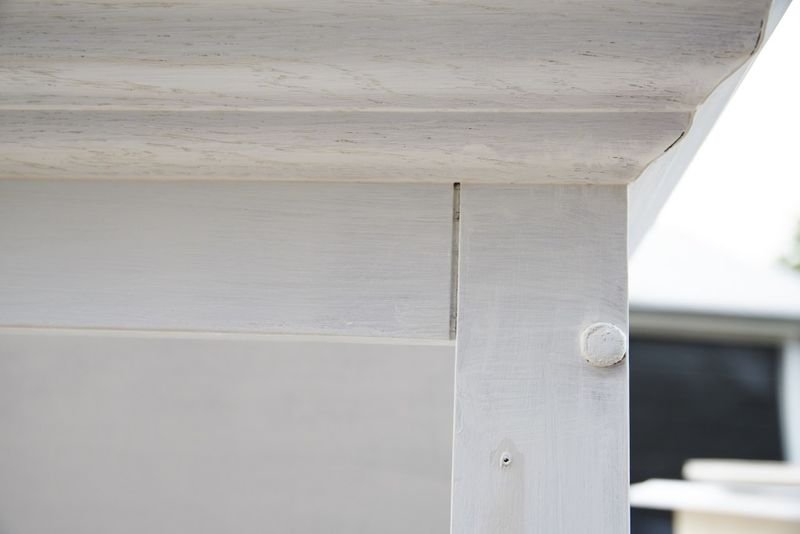
If you’re not very experienced at painting, I recommend trying a “wash” because it doesn’t need to be perfect, and in fact, the more imperfections, the better it ends up looking.
This was my first time attempting to do a “wash,” so Will had to teach me how to do it. It’s actually much easier than I thought! All you have to do is dip the brush in the paint, dip it in a bowl of water to dilute the paint and then spread it on. If you have too much paint still on the brush, add more water until you get the transparency you’re looking for. I thought you had to make a specific mix of X parts paint and X parts water, but this was much easier and turned out great!
3. It’s all about the finishing touches
It’s amazing how far new hardware goes when you’re refinishing furniture. If you have a lot of handles to replace, I recommend buying bulk packages rather than one-offs, unless you want to get something very unique. I also recommend measuring the distance of the holes first before going out to purchase the hardware so that you’re not stuck driving back to the store to get the right size (as I have learned from experience).
Finishing touches also means thinking through what the piece will be used for and deciding on whether or not to apply a finish to the piece. For the hutch, we decided to leave it as is, but for the dressers that we repainted for the nursery, we wanted something that we could easily wipe off and so we chose a matte seal to finish it, with a light sandpaper to smooth it off. Depending on the project, the finish will vary.
4. Seek professional advice
If you’re unsure of what to do, I highly recommend talking to the employees at your local home improvement store. They are so knowledgeable and can help make recommendations about any project! Whether you’re looking for suggestions on wood for a plank wall, or which seal is best for finishing a project, these guys (and gals) know their stuff! It’s also much easier to go in and ask than it is to try and find an answer online for a specific question you might have.
5. Be creative – make your furniture work for you
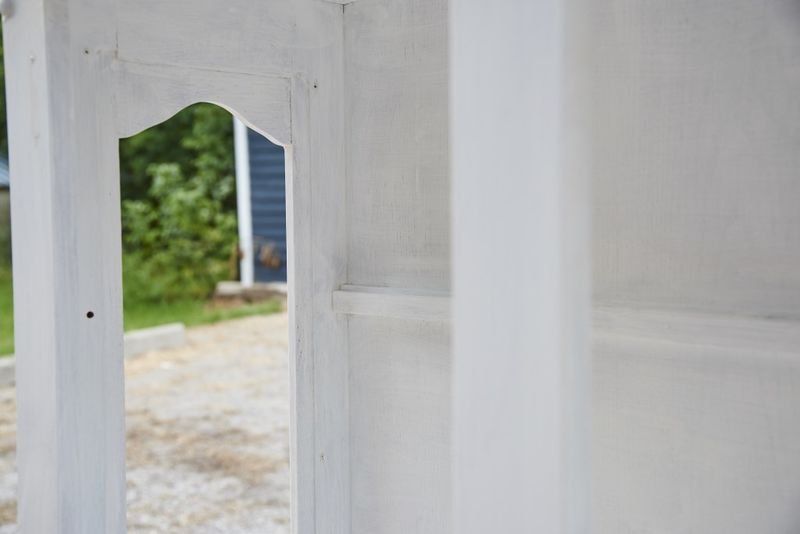
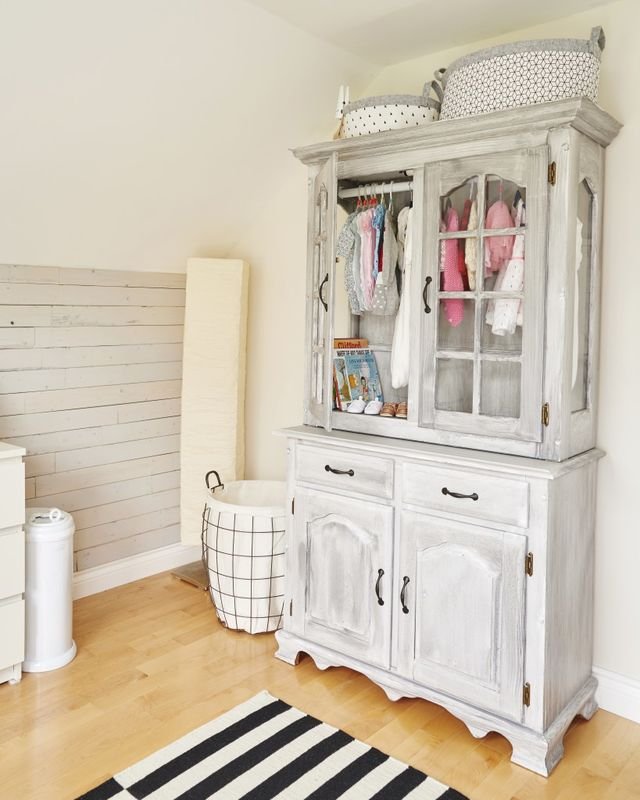
To borrow some great advice from Project Life founder Becky Higgins, create with the end in mind. In the case of the hutch, we knew we wouldn’t be using it as a china cabinet, and so we made a couple creative adjustments while we refinished it so that it would work better for us. Since the nursery doesn’t have a closet, we decided to add in a closet rod and remove the shelves so that we could use it to display all the cute dresses we have for our little one.
This creative addition allowed us to make this piece work for our specific need, and having a functional piece of furniture is the best part of refinishing! We love how it turned out and how rustic it looks with the brush marks from the grey-wash. It makes a perfect addition to our little girl’s nursery. We sure hope she likes it as much as we do!